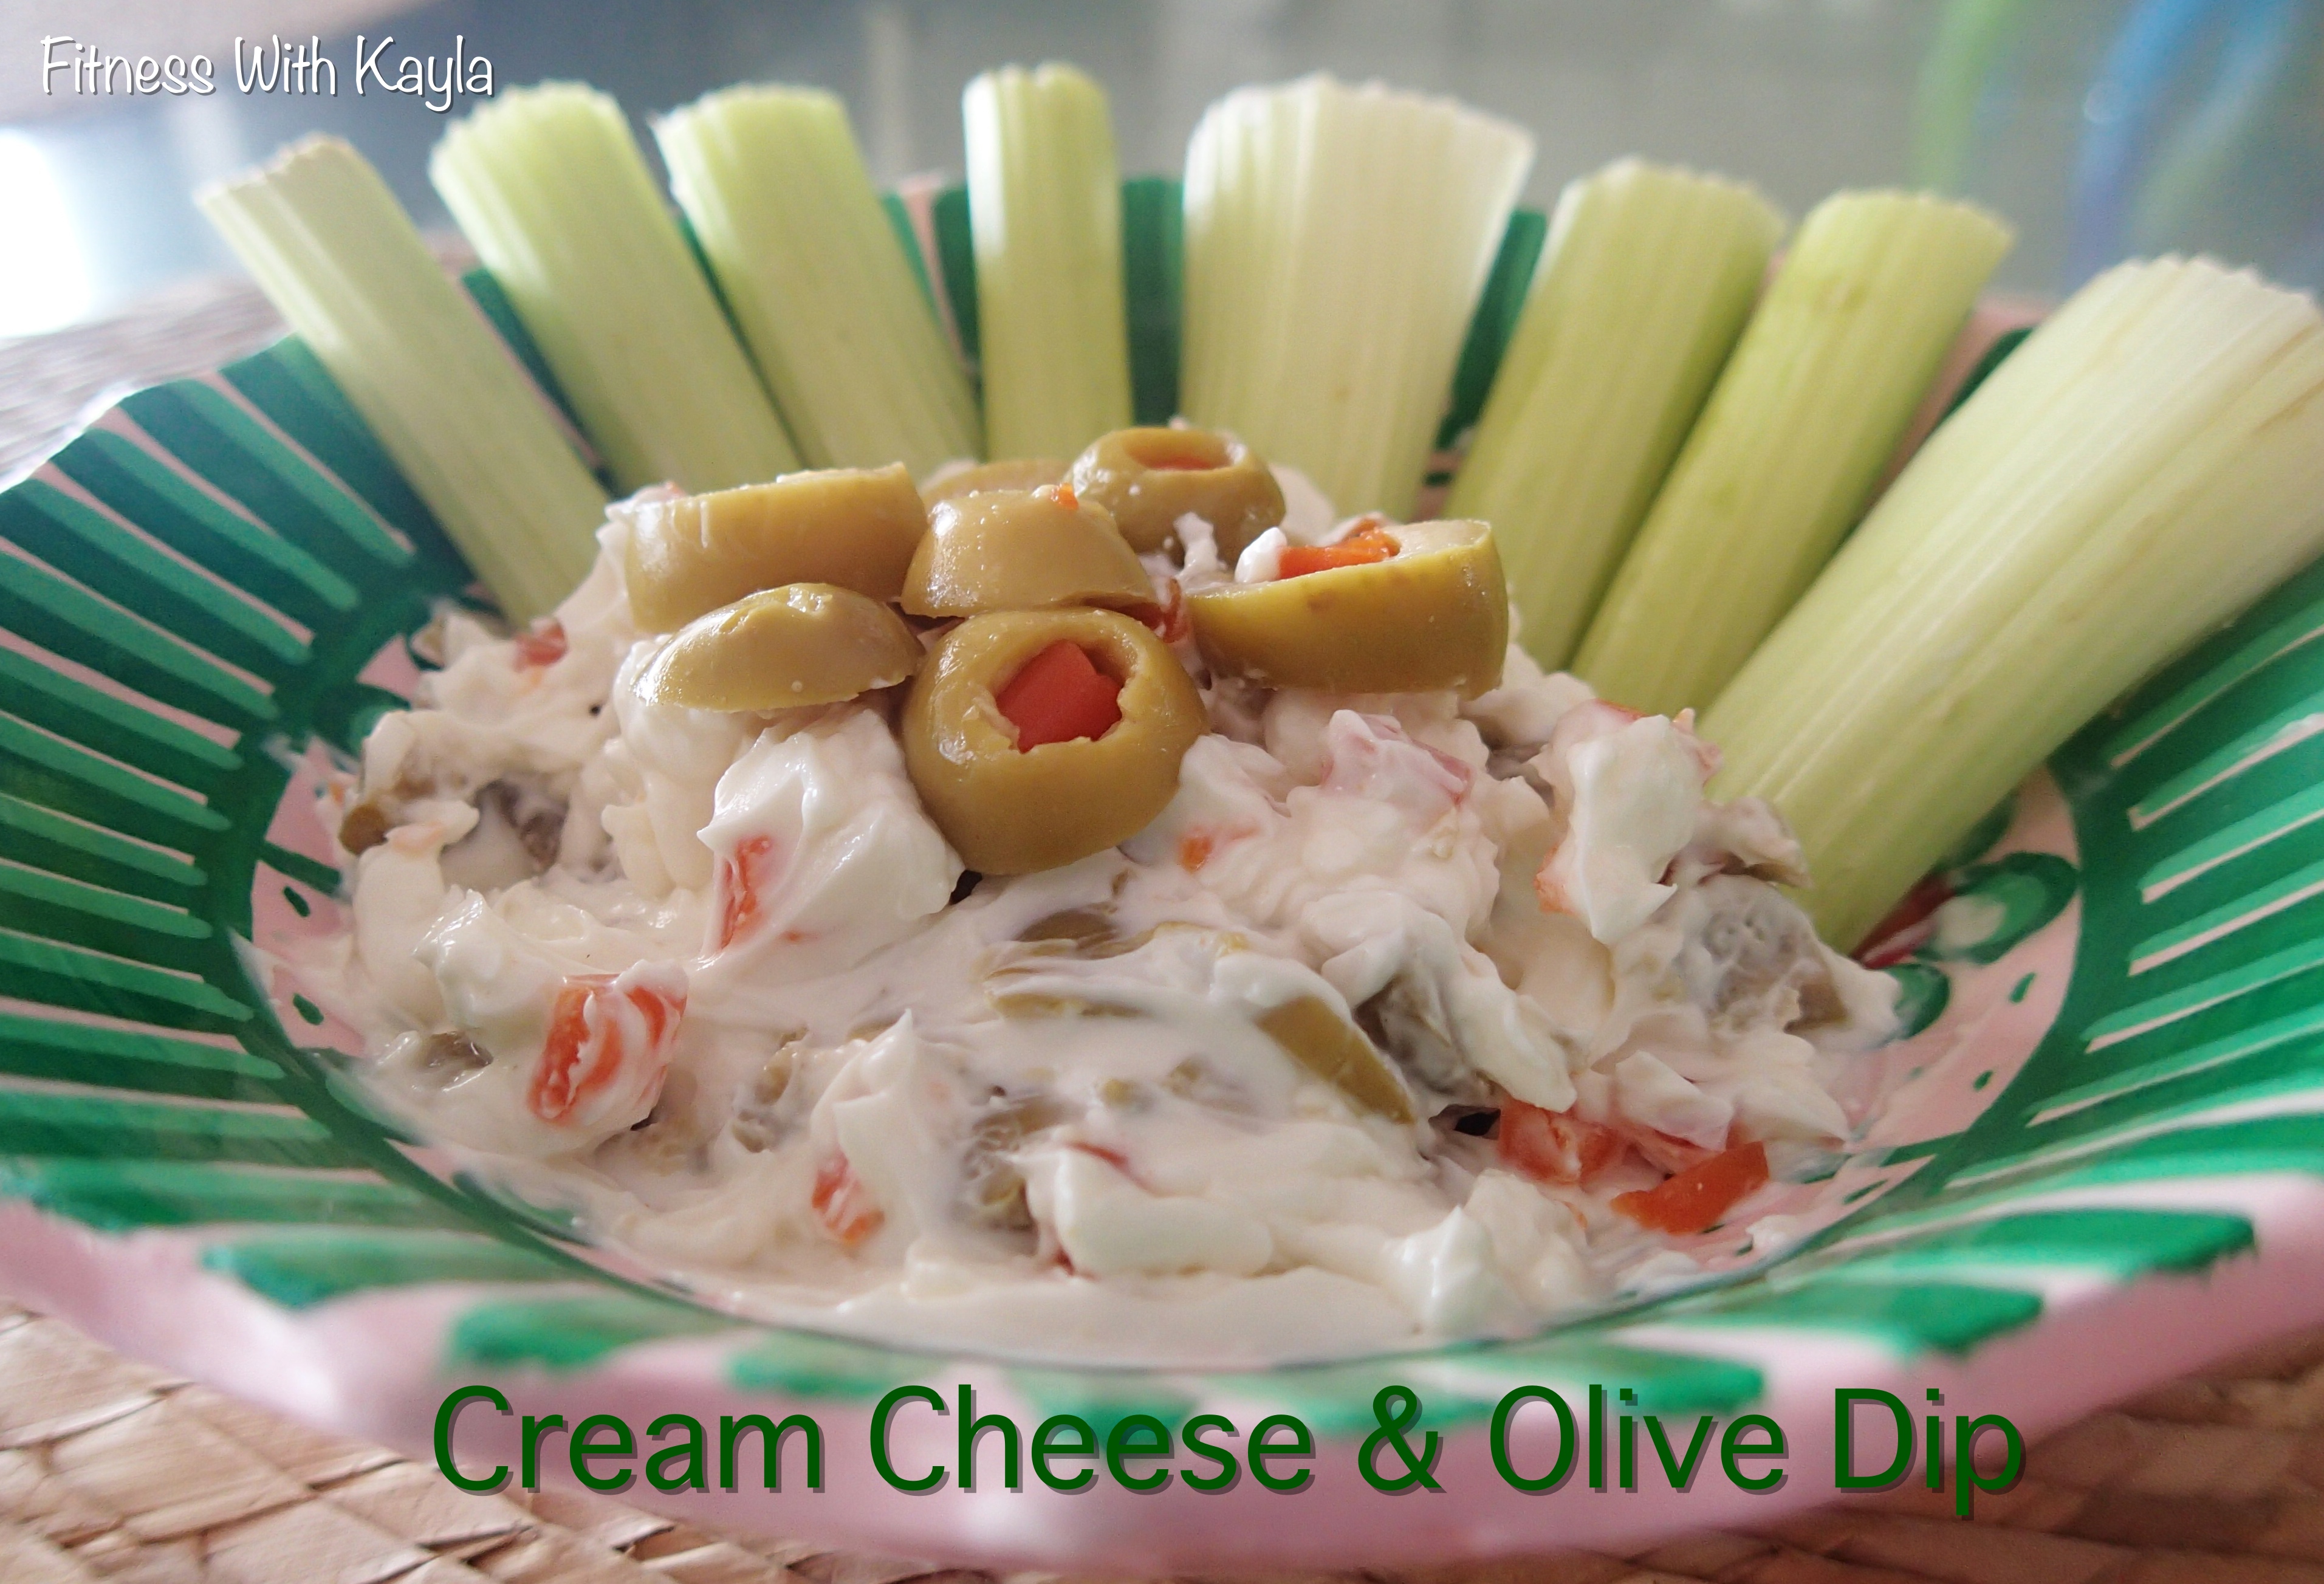
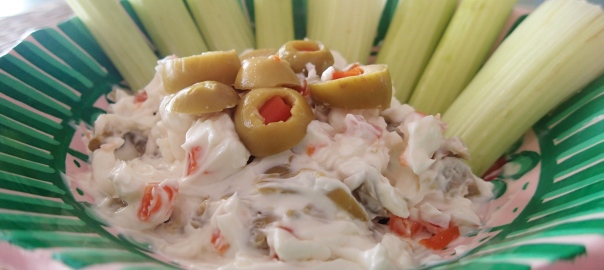
If you are looking for a quick and easy snack, or a quick appetizer to bring to a party, try out this tasty treat. With just 3 ingredients, it takes less than 5 minutes to prepare! It taste great with veggies, on a sandwich, or with crackers or chips such as Triscuits or Doritos!
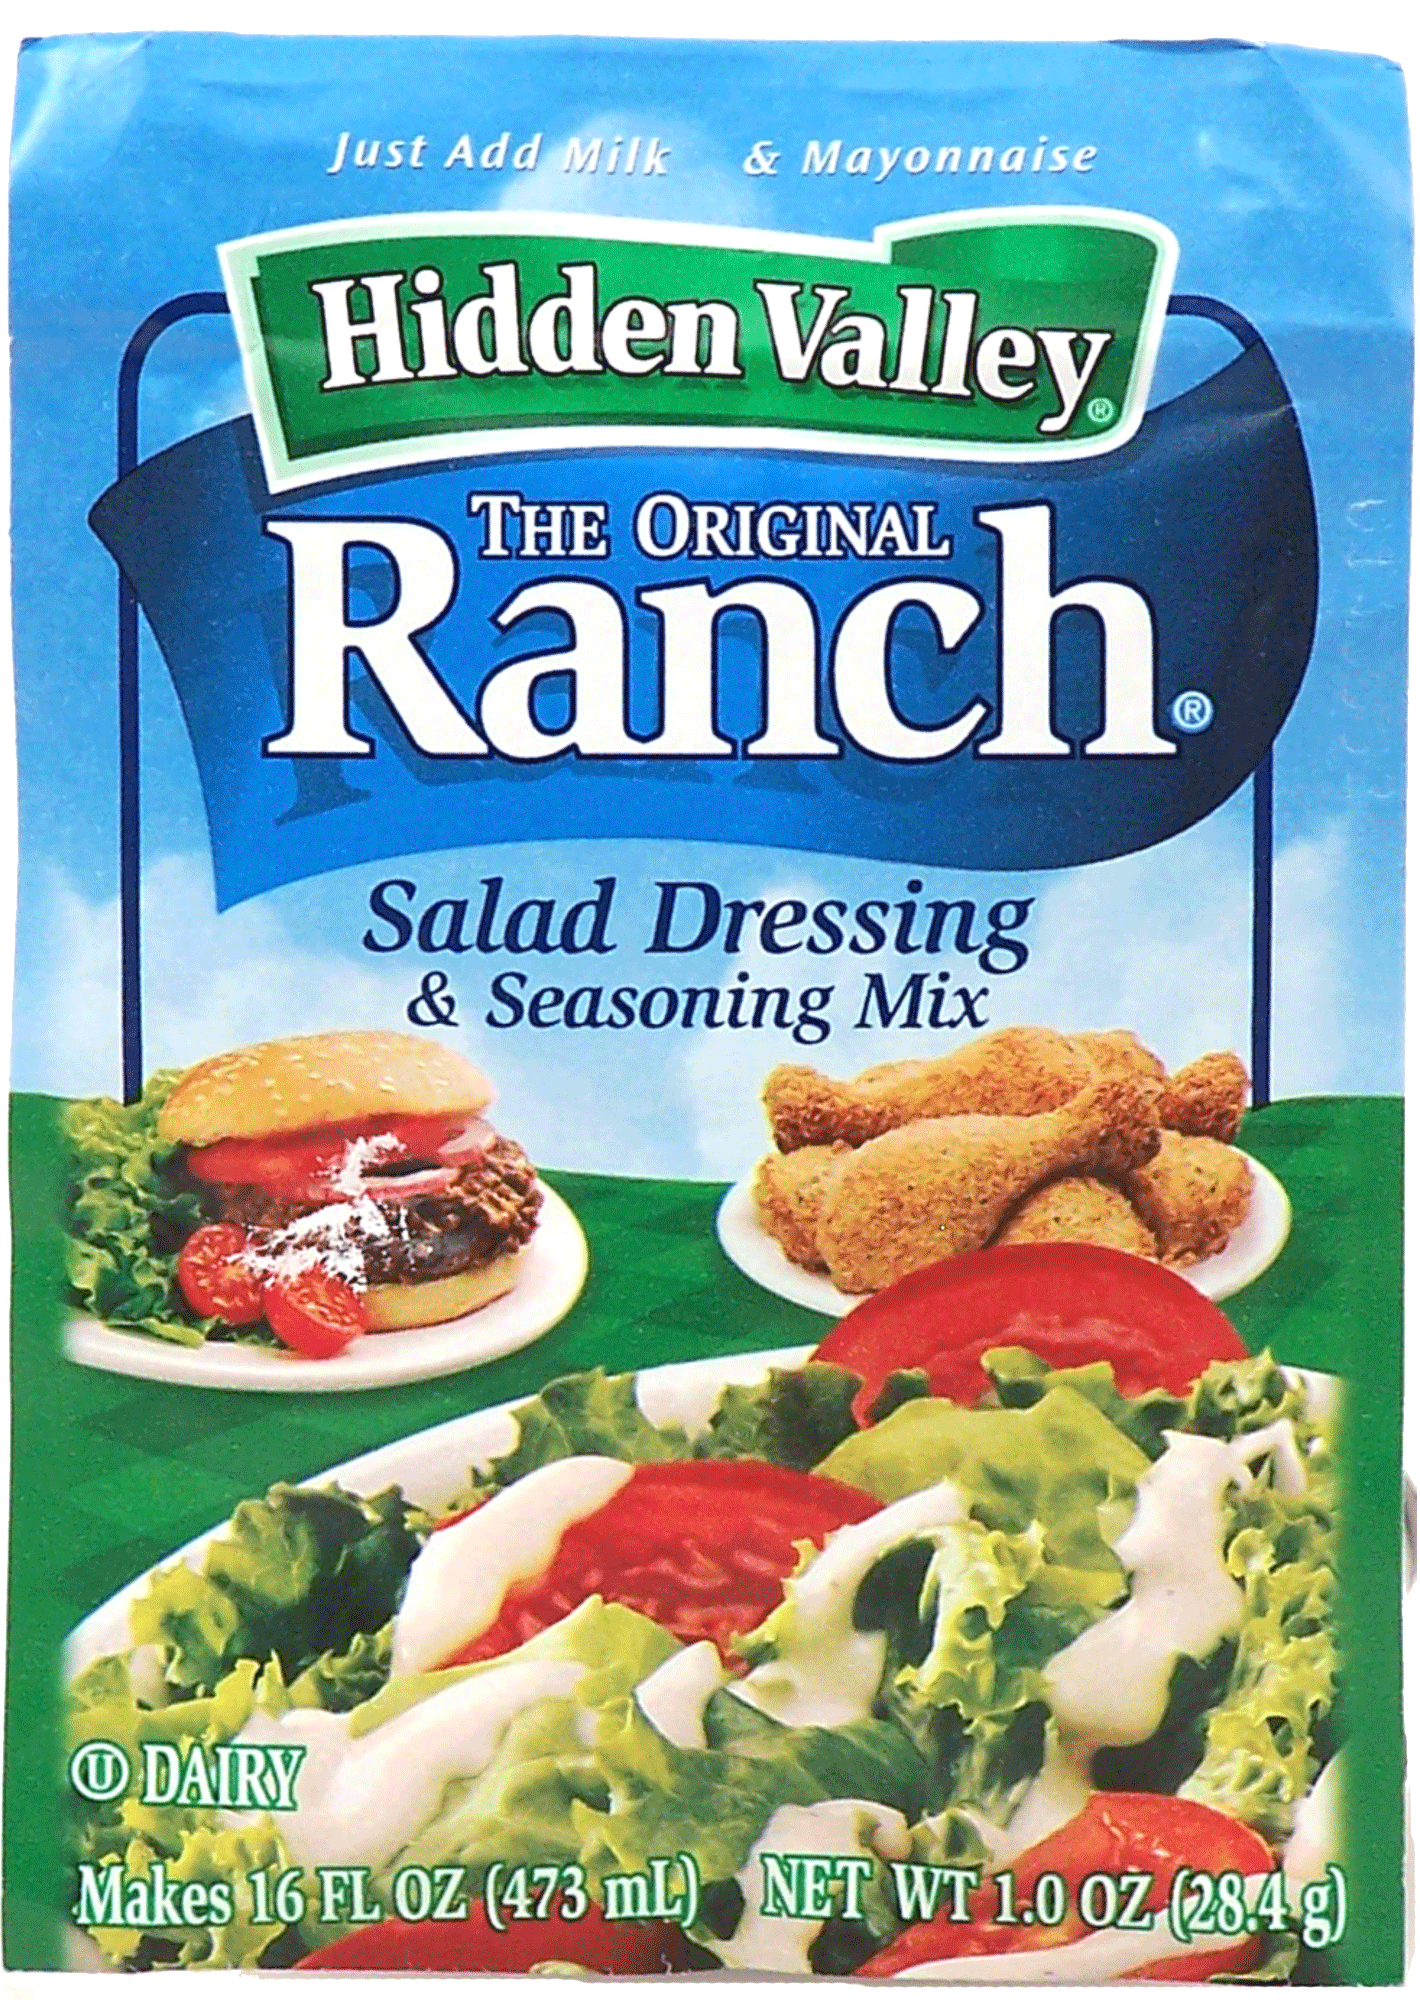
Who loves Ranch Dressing?? This girl right here… AND I know I’m not the only one! Today, I am going to share with you how I make my homemade ranch seasoning, which is so versatile and useful in many recipes. It is so fast and easy to make. I try to have a batch on hand at all times
Before I moved to Mexico, I would buy these Hidden Valley Ranch Dressing seasoning mixes when I was craving homemade ranch dressing.
Living in Mexico, you learn to change your habits, because many things are very hard to come across, or just not available.
I came up with this quick easy recipe, and it taste just like the package stuff, but its so much better!!! I have read many different recipes, and after many tries, I have found this is what we like the best.
Here is the recipe for the mix:
Ingredients:
1 Tbsp dried Parsley
2 tsp dried Dill (or more depending on how much you like dill- I use almost 1 Tbsp in mine)
1-2 tsp Garlic Powder
1 tsp Onion Powder
1/2 – 3/4 tsp dried Basil
1/2 tsp Black Pepper
Instructions:
1- Add each of the dried spices to a bowl and mix carefully.
2- Store in an airtight container or Ziploc bag.
Use this Homemade Ranch Dressing Seasoning to replace the pre-packaged. Check out my blog on Homemade Lightened Up Buttermilk Ranch Dressing, which uses this awesome mix!
How many recipes do you have that require shredded chicken? I could probably come up with a lonnnnnng list, but I will save that for another time. My favorite uses of shredded chicken are in casseroles, soups, and CHICKEN SALAD!!! My family just loves chicken salad, and it is so easy to whip up using either my Crock Pot Shredded Chicken recipe, or left over Crock Pot Whole Chicken…or even a store bought Rotisserie Chicken. You chose which chicken route you prefer, but today I am going to share with you first my Crock Pot Shredded Chicken… and then check out my recipe for my Homemade Chicken Salad!!!
Ingredients:
3-4 Chicken Breasts
2 Carrots- chopped in large chunks
3 stalks Celery- chopped in large chunks
1/2 medium Onion- chopped in large chunks
2 cloves Garlic, minced
1 Jalapeño- diced (optional)
2-3 cups Chicken Broth or 1 cube Bouillon in 2-3 cups Water OR 2-3 cups Water
Garlic Salt (to taste)
Pepper (to taste)
Optional: 1 tsp Dried Basil
Instructions:
1- Heat Crock Pot to High.
2- Add the Chicken Breasts to the bottom of the Crock Pot, topped with all chopped veggies.
3- Cover chicken and veggies with Chicken Broth.
4- Cover Crock Pot and cook on high for 3-4 hours, or until chicken is tender enough to cut with a fork (or to desired doneness.) (or if you prefer, cook on Low for 5-6hours)
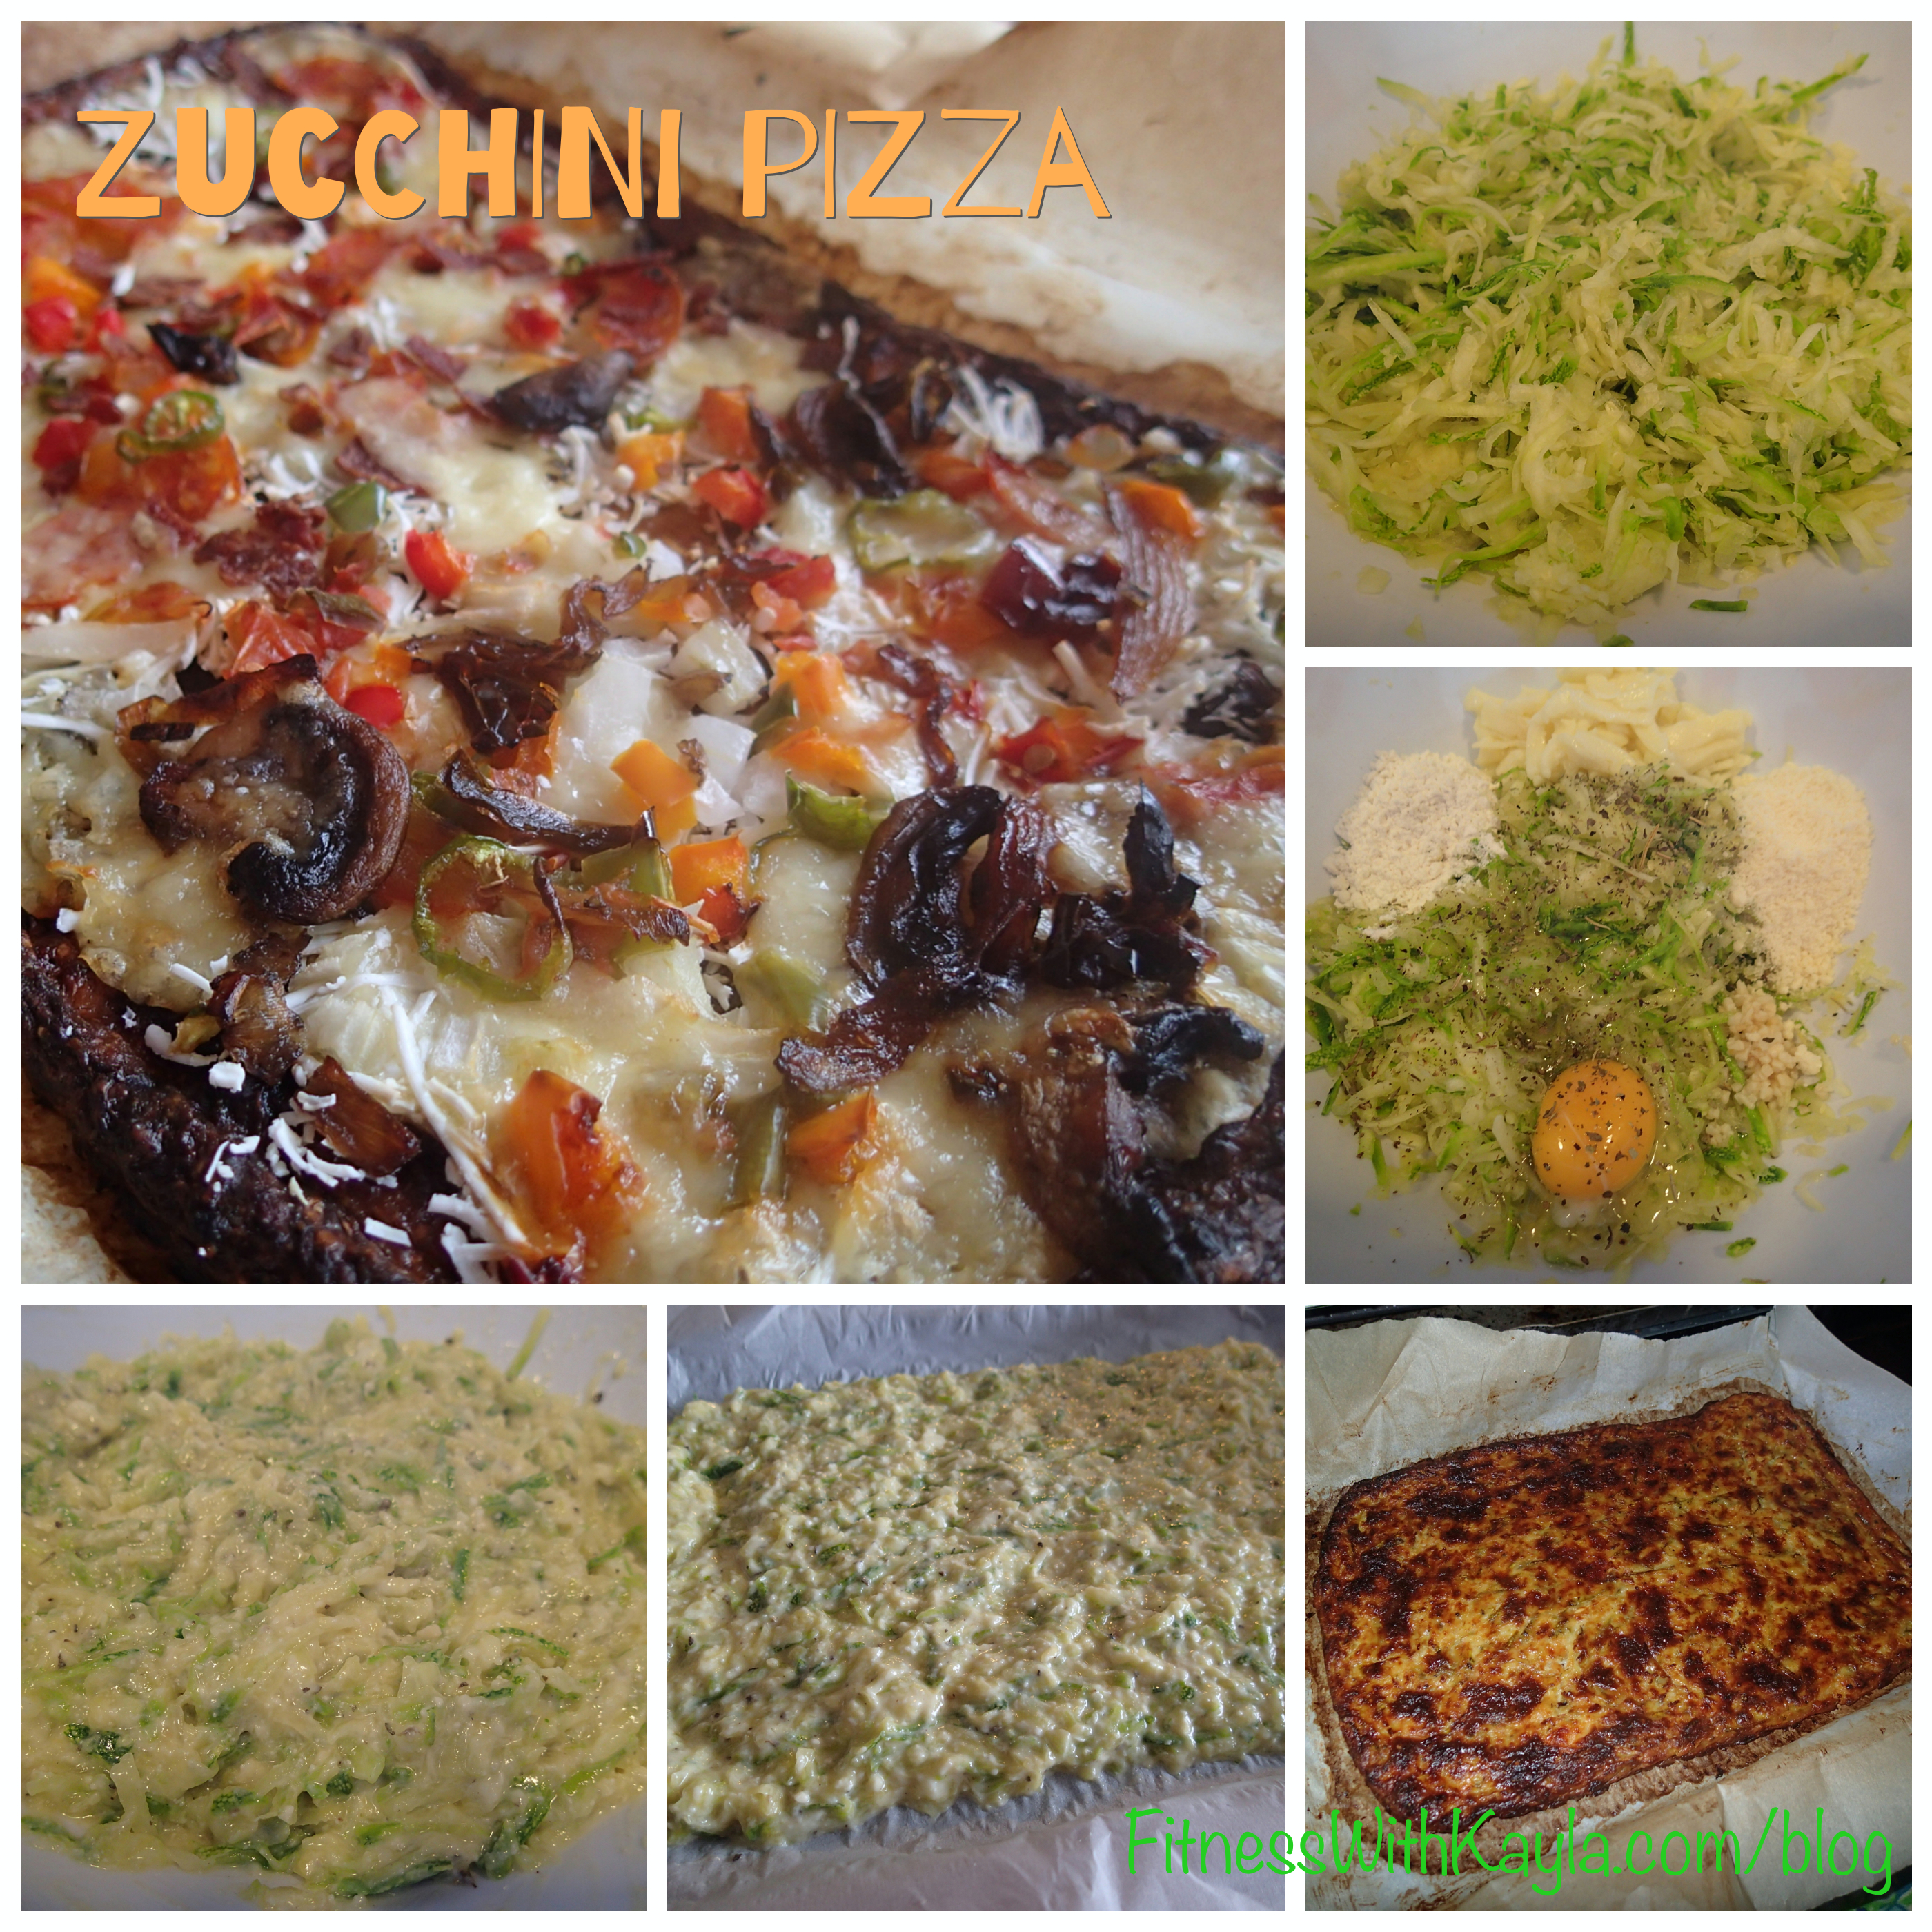
Here it is… my latest pizza recipe!!! This one just might be my best pizza yet! I know its hard to believe, but this low carb pizza is out of this world!
As you all must know by now… I love PIZZA… and especially if I can make healthy pizza. I thought that my greatest pizza success was Cauliflower Pizza, but I think I have definitely found something better! This Zucchini Pizza is just amazing!
The key to making this pizza is to use fresh zucchini, and be sure to squeeze as much water out of it as possible. If you leave too much water in, the pizza will not stay together. You can easily double this recipe to make a larger portion, if you would like. I really love this pizza because you can add any kind of topping that you desire, and it always turns out great! In the photo above, I made a half veggie and half loaded zucchini pizza!
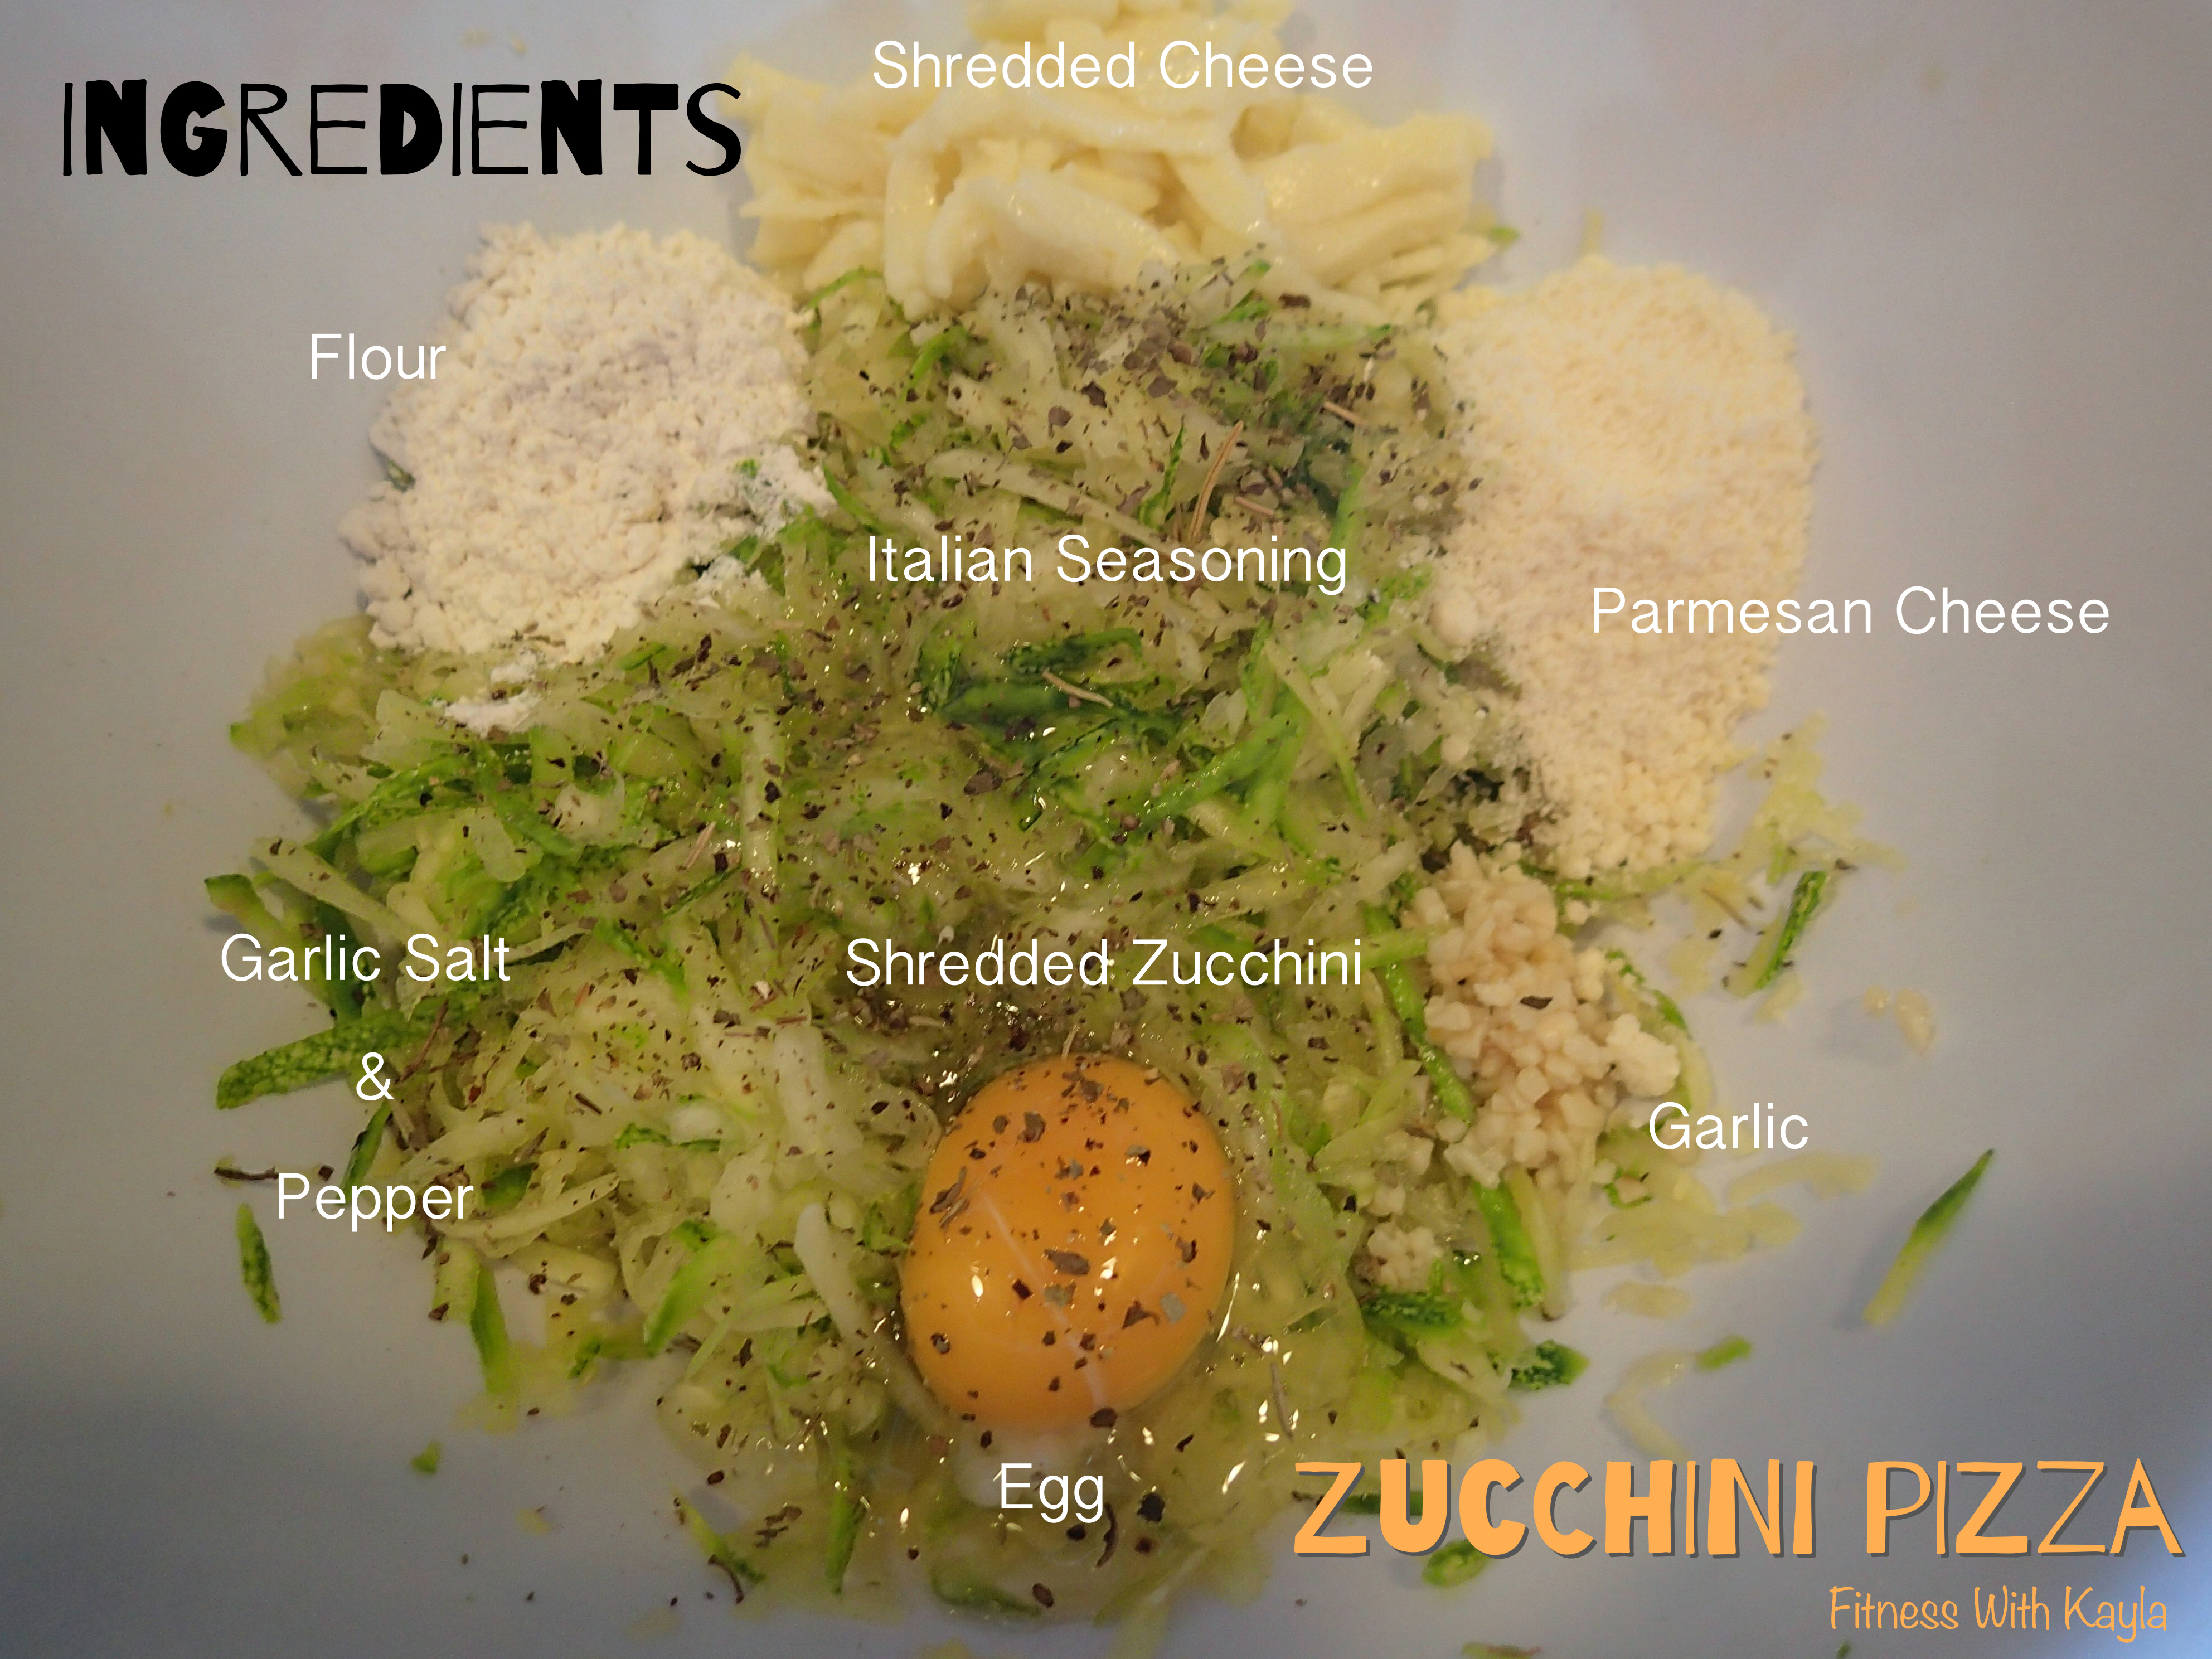
Here is what you need to make Zucchini Pizza:
Ingredients:
2 cups Shredded Zucchini, packed and drained*
1 clove Garlic, minced
1 Egg
4 Tbsp Parmesan Cheese, grated
1/4 cup Shredded Cheese (any kind such as Mozzarella, Monterrey Jack, Cheddar, Chihuahua, Manchego, etc)
2 tsp Italian Seasoning
2 1/2 Tbsp Flour (or Rice or Almond Flour)
1 tsp Garlic Salt
1 tsp Pepper
Note: Once you shred the zucchini, be sure to squeeze as much water out as possible. Pack the zucchini tightly into a measuring cup to yield 2 cups.
Instructions:
1- Shred Zucchini into a large mixing bowl. Working in batches, squeeze the water out of the zucchini, using your hands. Transfer zucchini on to a clean dish towel and squeeze out the remainder of the liquid. Once zucchini is drained, transfer to a measuring cup and tightly pack the zucchini to yield 2 cups.
2- Return zucchini to large mixing bowl and add remaining ingredients. Preheat oven to 350-400° F.
3- Mix all ingredients well, and form a ball with the mixture.
4- Line a baking sheet with parchment paper (you can also use foil, generously sprayed with non-stick cooking spray), and press zucchini mixture onto the baking sheet.
5- Form a rectangle or circle shaped pizza.
6- Bake for 15-20 minutes, until crust is a golden brown (see above photo).
7- Remove from oven and top pizza with your choice of toppings. (In this pizza, the veggie half of the pizza was onion, bell pepper, mushrooms, jalapeño, and cheese. The loaded half was onion, bell pepper, jalapeño, turkey bacon, pepperoni, and cheese.)
8- Return the pizza to the oven and cook for an additional 10 minutes, or until cheese is melted and pizza crust is crispy.
9- Remove from oven and slice pizza. Serve immediately with pizza/tomato sauce for dipping!
And that’s all there is to it… I hope you all enjoy this yummy recipe as much as my family does! I would love to hear your comments on this recipe, so let me know what you think! ENJOY 🙂
1/4 cup Shredded Cheese (any kind such as Mozzarella, Monterrey Jack, Cheddar, Chihuahua, Manchego, etc)
2 tsp Italian Seasoning
2 1/2 Tbsp Flour (or Rice or Almond Flour)
1 tsp Garlic Salt
1 tsp Pepper
Instructions
Shred Zucchini into a large mixing bowl. Working in batches, squeeze the water out of the zucchini, using your hands. Transfer zucchini on to a clean dish towel and squeeze out the remainder of the liquid. Once zucchini is drained, transfer to a measuring cup and tightly pack the zucchini to yield 2 cups.
Return zucchini to large mixing bowl and add remaining ingredients. Preheat oven to 350-400° F.
Mix all ingredients well, and form a ball with the mixture.
Line a baking sheet with parchment paper (you can also use foil, generously sprayed with non-stick cooking spray), and press zucchini mixture onto the baking sheet.
Form mixture into a rectangle or circle shaped pizza.
Bake for 15-20 minutes, until crust is a golden brown (see above photo).
Remove from oven and top pizza with your choice of toppings. (In this pizza, the veggie half of the pizza was onion, bell pepper, mushrooms, jalapeño, and cheese. The loaded half was onion, bell pepper, jalapeño, turkey bacon, pepperoni, and cheese.)
Return the pizza to the oven and cook for an additional 10 minutes, or until cheese is melted and pizza crust is crispy.
Remove from oven and slice pizza. Serve immediately with pizza/tomato sauce for dipping!
Notes
*Once you shred the zucchini, be sure to squeeze as much water out as possible. Pack the zucchini tightly into a measuring cup to yield 2 cups.
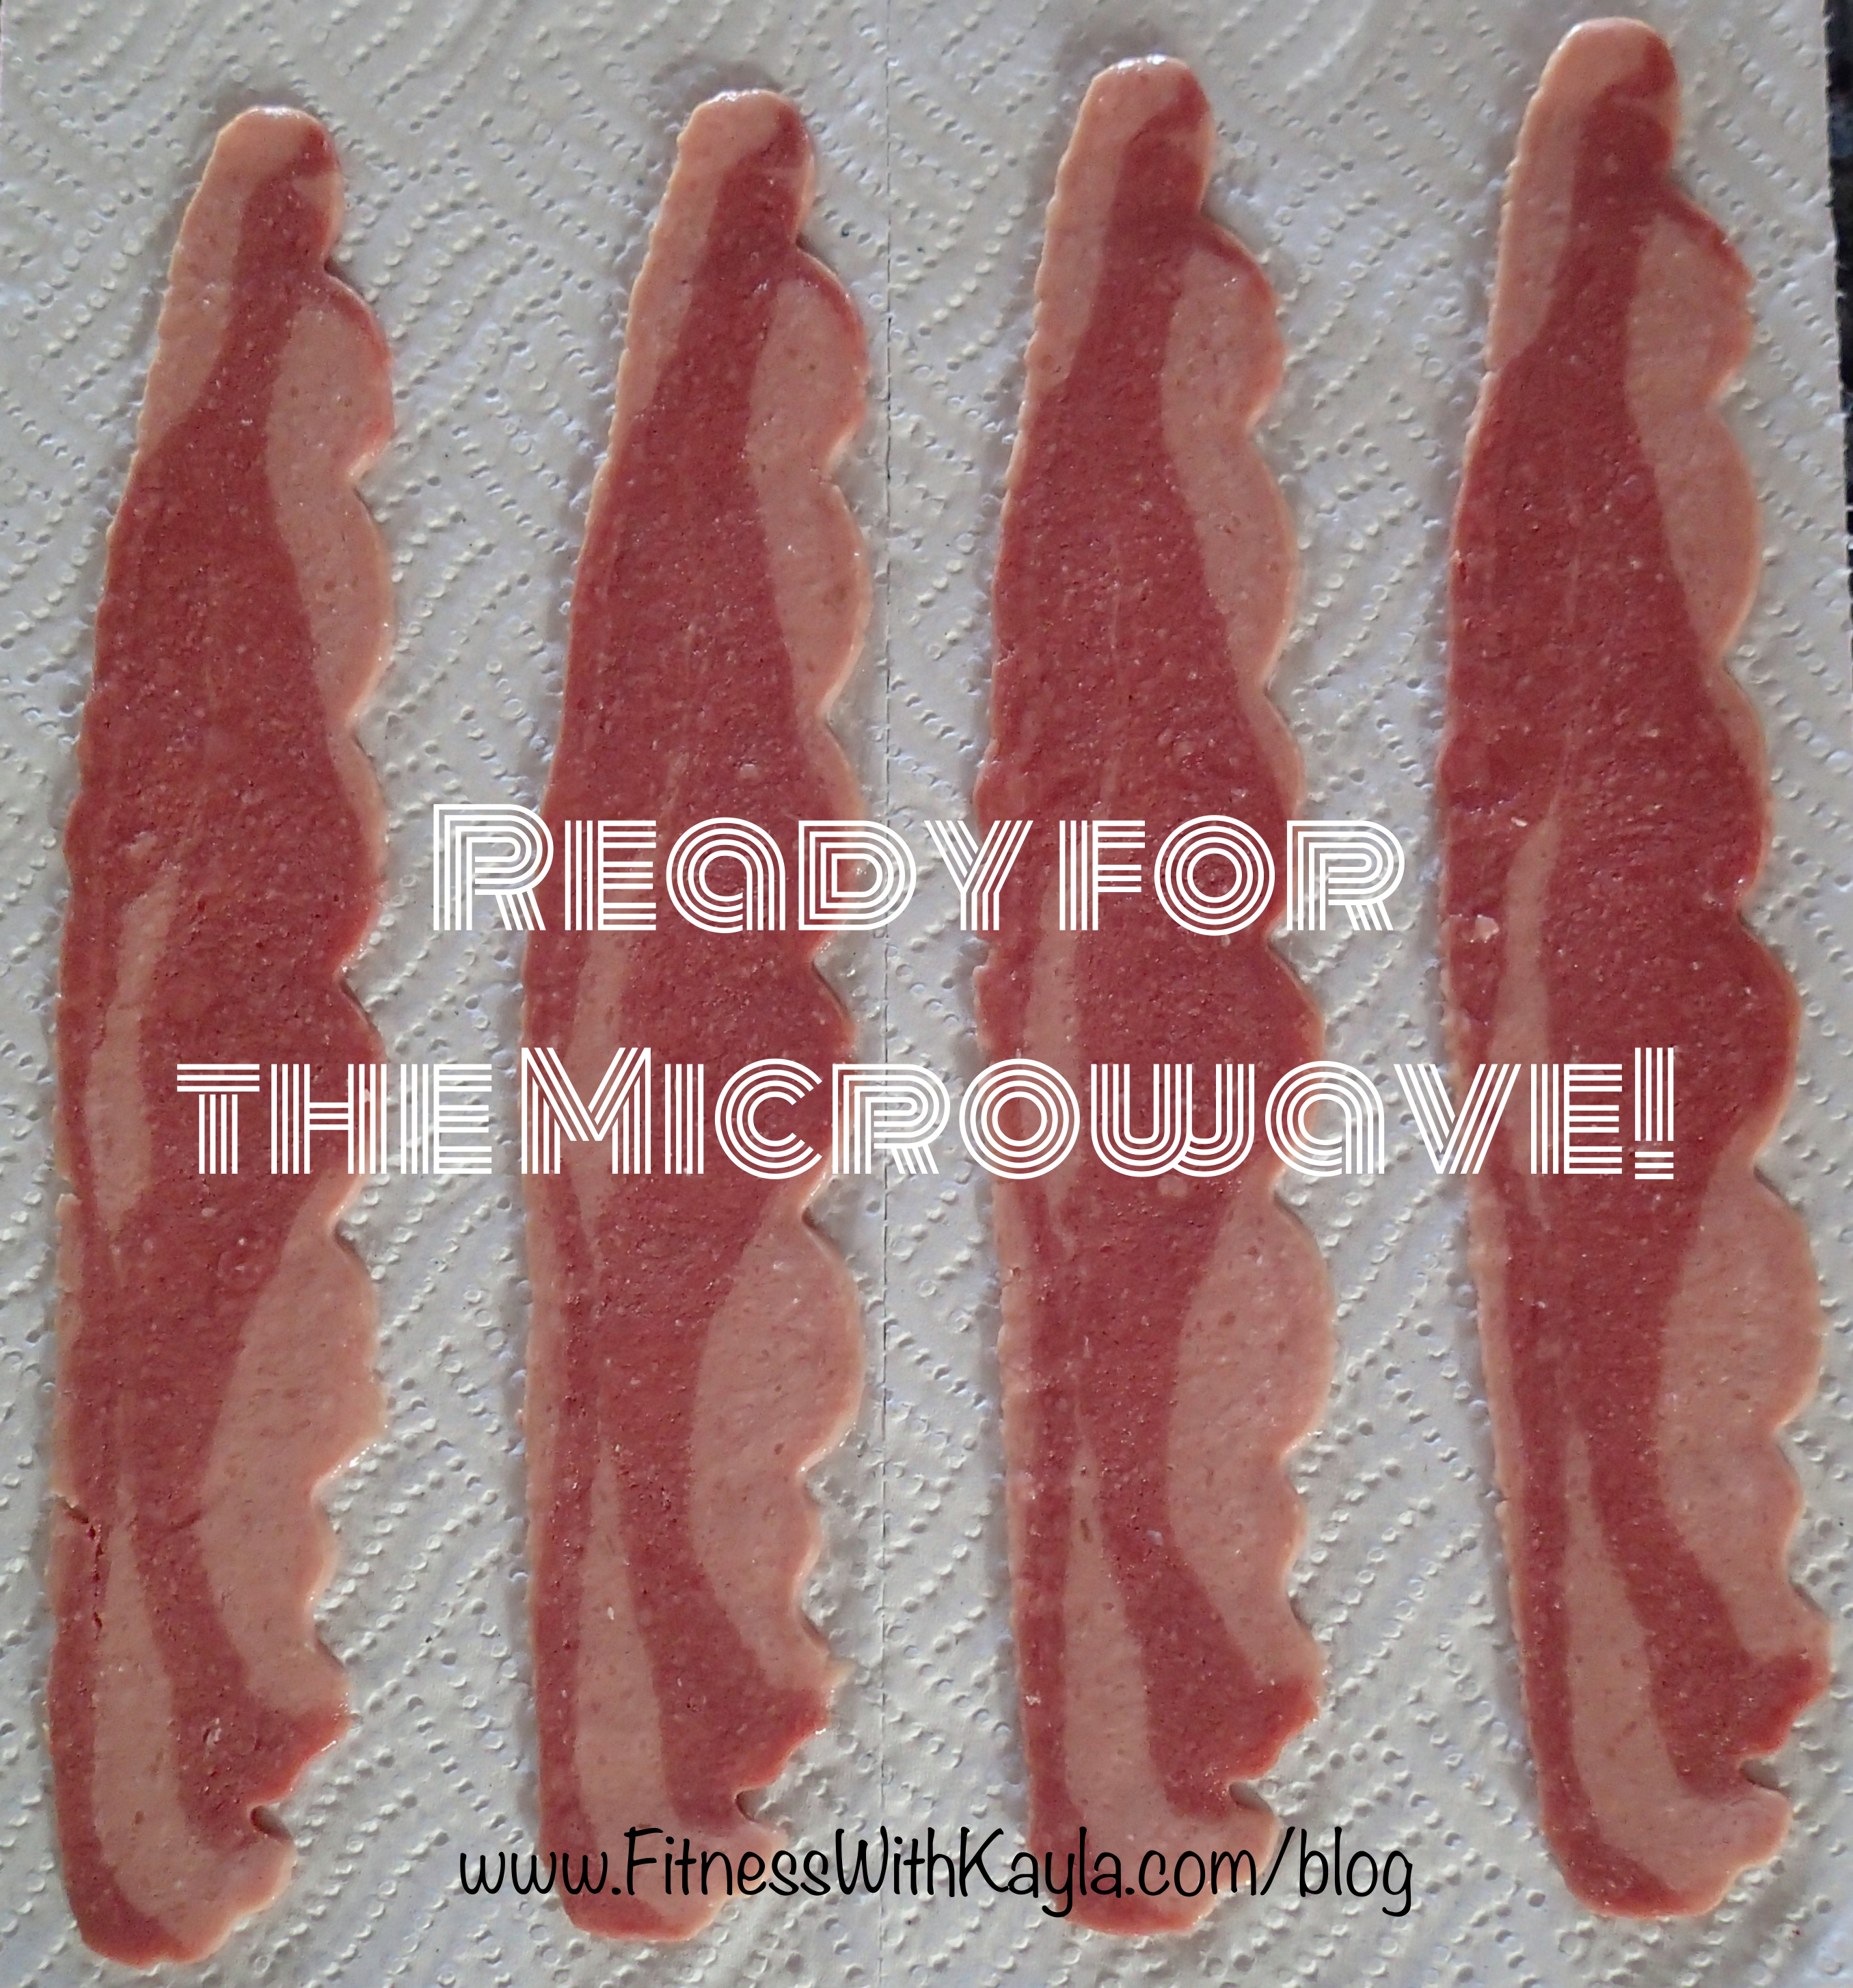
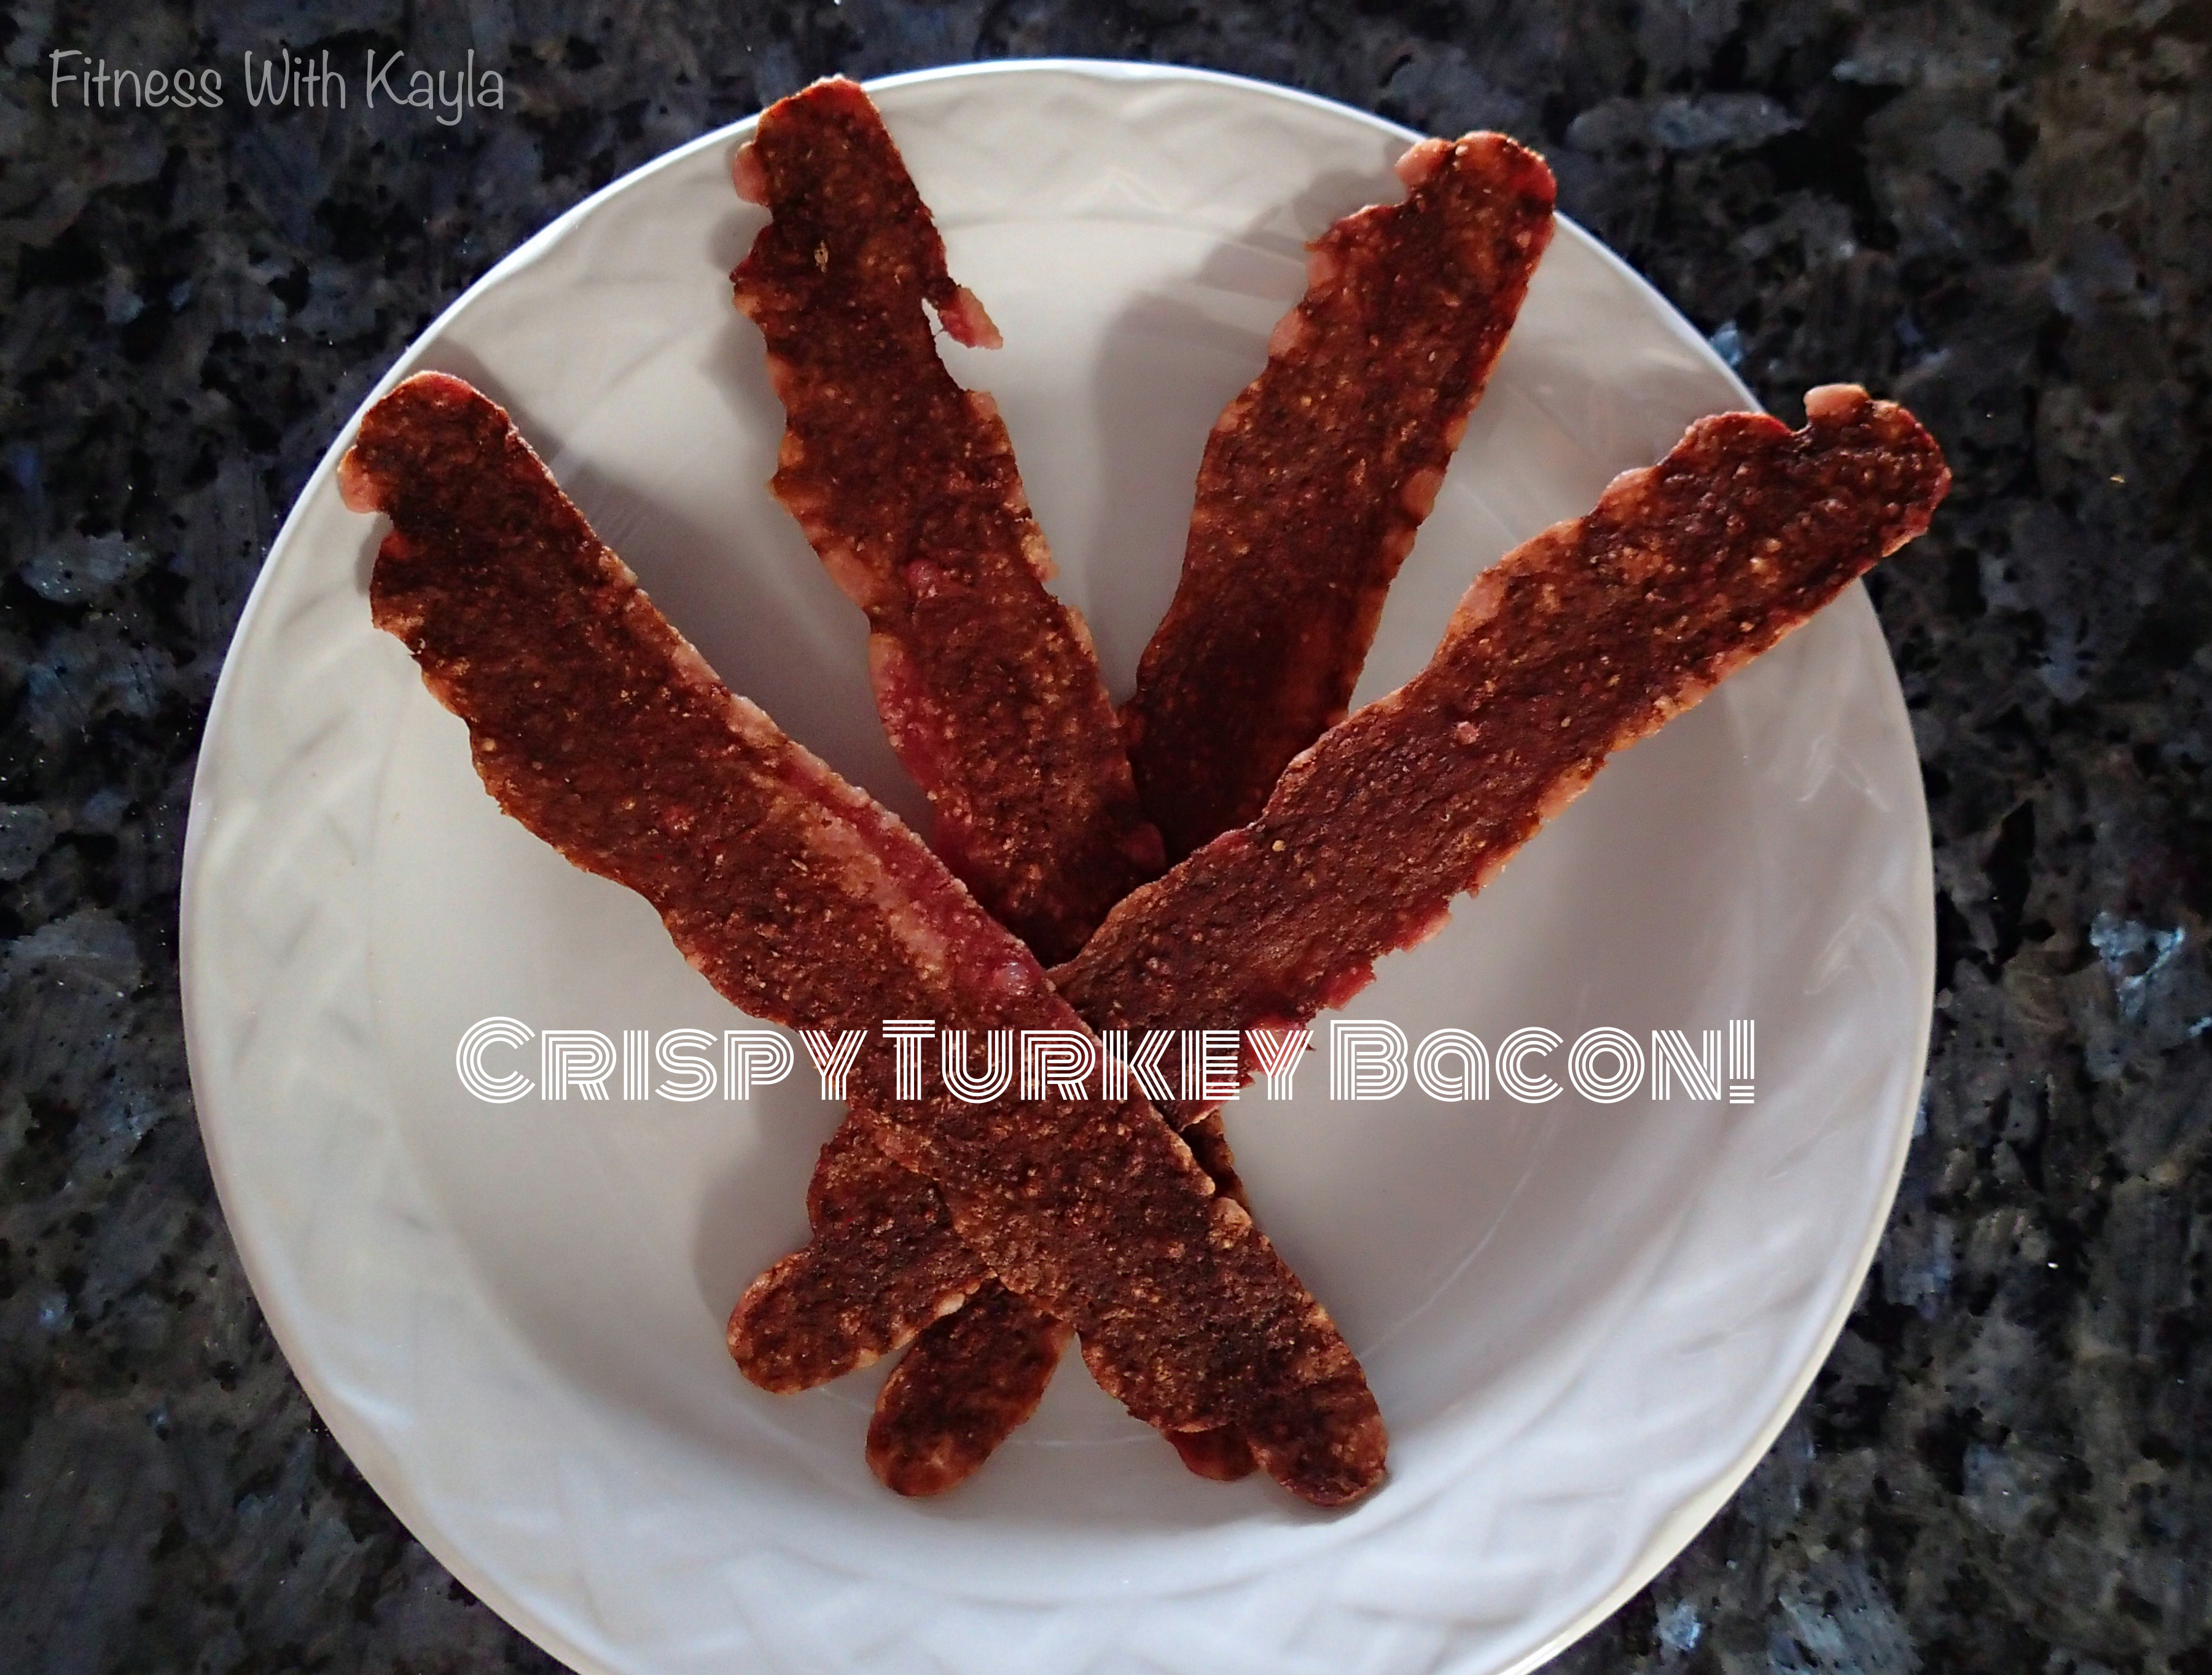
Do you love bacon, but don’t love the extra fat and grease that it adds to your diet? Well I have a solution for you! I swap out Bacon for Turkey Bacon, and instead of cooking it in a greasy pan, I cook the bacon slices between paper towels in the microwave. You will still accomplish a crispy piece of tasty bacon, but without the fat and grease!
How to cook Turkey Bacon, FAST and EASY!
What you need:
3-4 Slices Turkey Bacon
3 Paper Towels
1 Microwave
What to do:
1- Place 2 paper towels on top of each other.
2- Arrange turkey bacon slices on the paper towel so they are not touching.
3- Place 1 paper towel lightly over the bacon slices.
4- Transfer bacon and paper towels to the microwave.
5- Cook in 30 second increments, checking on bacon after each 30 seconds. Allow bacon to rest for 15 seconds between cooking increments. Cook until bacon has reached desired crispiness. (About 6 sets of 30)
6- Allow to stand for 30 seconds before using.
Please remember that cooking times will vary with microwaves, so keep an eye on your bacon to be sure it does not burn.
I hope that this fast and easy trick to cooking crispy bacon in the microwave will help you not only still be able to enjoy bacon, but also speed up the cooking process.
Also, I do need to give my mom some credit for this one, as she is the one who introduced this trick to me!! Thanks Momma!
As always, please PIN, Like, and SHARE my blogs and recipes. I would love to hear your feedback! ENJOY! 🙂
Craving Pizza, but don’t want the added grease, carbs, fats, etc? I have yet another solution for you. Try making Pita Bread Pizza, right in your oven. Its fast, easy, and so tasty.
What you need:
1 Pita (Depending on the thickness of the pita bread, and the thickness of crust you desire, you can use the whole pita, or slice it in half, so the pita is not as thick.)
2-4 Tbsp Pizza Sauce (or any tomato sauce will do)
Handful of Shredded Cheese (any kind you would like- I used Chihuahua that I shredded myself, but Mozzarella, Cheddar, Monterrey Jack, etc will work, too!)
Any additional healthy toppings, such as onion, tomato, bell pepper, jalapeño, turkey bacon, etc.
What to do:
1- Preheat oven to 300°F. Place pita directly on the rack of your oven. Warm the pita until it begins to crisp. Remove pita from oven and place on a plate.
2- Increase oven temperature to 350°.
3- Cover pita with desired amount of tomato/pizza sauce (2-4 Tbsp should do). Top the tomato sauce with a handful of shredded cheese. (See photo below)
4- Return pita to preheated oven and cook until cheese begins to melt, about 5-6 minutes. If you are using additional toppings, remove pita from the oven and add those toppings now. (I used diced onion, tomato, and jalapeño). Return pizza to the oven, and cook the pita bread pizza until cheese melts and the pizza is crispy. See note below)*
If you are not adding additional toppings, continue cooking the pita bread pizza until cheese melts and the pizza is crispy. (see note below)*
5- Once cheeses have melted and pizza reaches desired crispiness, transfer the pizza from the oven to a plate or wire cooling rack. Allow to cool slightly before cutting and serving.
Note: *Ovens vary in temperature, so keep an eye on your pizza to insure it does not burn. If it begins to burn, place the pita on a piece of foil to prevent burning.
**Feel free to use more or less cheese. I tend to use enough cheese to cover the pita, but there is no exact amount that you need to use!
I hope that you enjoy this quick, easy, satisfying pizza! Stay tuned for more simple and healthy meals, snacks, and tricks coming soon!
So yesterday I shared with you my newest Cauliflower recipe… A Cauliflower Pie Crust.
Well, today, I am going to share with your what I put inside of that delicous, yet healthy crust.
PRESENTING…
Tomato Basil Quiche
Tomatoes, Eggs, Cheese, Fresh Basil… need I say more??
I said this yesterday, but I am going to repeat my self…
YOU NEED TO TRY THISSSSSSS!!!!
I would also like to say this… This Quiche does not need a crust, so if you prefer to cook it directly in the pie pan, you can do so. I found the Tomato and Basil to compliment the cauliflower quite nicely, so if you want my opinion, give it a try! 🙂
Let’s get started…
Part 2-
Tomato Basil Quiche
2-3 Tomatoes, (one tomato sliced for the top & remaining tomatoes diced with seeds removed- I use 1-2 diced tomatoes, depending on the size)
1/3 cup fresh Basil, finely chopped
2 cloves Garlic
1/2 cup Onion, diced
1 Jalapeño, finely diced, with 4-5 slices (optional)
2 slices Turkey Bacon (optional)
5 Eggs or 4 Eggs with 2 Egg Whites
3/4 cup Light (Skim) Milk
1/2 – 3/4 cup Shredded Cheese (see note)* (+ additional for garnish, if desired)
3 Tbsp Parmesan Cheese
1/4 tsp Garlic Salt
1/4 tsp Pepper
*For the shredded cheese, I used a combination of Manchego and Chihuahua cheeses, but any mixture from Monterey Jack, Cheddar, Mozzarella, Manchego, or Chihuahua would work well.
Instructions:
(If you are using the Cauliflower Crust from yesterday’s post, the oven will already be preheated. If you are not using the crust, preheat the oven to 350°F and spray the pie pan with non stick cooking spray. Set aside.)
1- Heat a large skillet coated with non stick cooking spray. Sauté onion, garlic, and diced jalapeño (if using) until tender. Once cooked, transfer to a medium bowl and set aside.
2- Slice one of the tomatoes in half and scoop out all of the seeds. Once seeds are removed, dice the tomato and add to onion mix. Slice your second tomato into slices of desire thickness, and set aside.( You can also slice a few pieces of jalapeños for the garnish, if desired.)
3- Measure out 1/3 cup Basil leaves and finely chop the leaves to desired size. Add basil leaves to onion and tomato mix. Add in cooked turkey bacon, if using, and stir well. Set aside until Cauliflower crust has cooked.
4- In a medium bowl, whisk eggs, milk, salt and pepper, until well combined.
5- Once crust has cooked, add onion/tomato mix to the bottom of the pie pan. Top with a little over a 1/2 cup of shredded cheese.
6- Pour egg mixture evenly over the cheese, and gently stir, being sure not to disturb the crust.
7- Bake quiche at 350°F for 10 minutes. Carefully, remove the quiche from the oven, and garnish with sliced tomatoes and jalapeños. Lightly salt/pepper the sliced tomatoes and sprinkle with remaining parmesan cheese (and/or additional shredded cheese).
8- Return the quiche to the oven for about 40 minutes, or until the filling is set completely. (If you notice the quiche burning on the top, lightly cover with a piece of foil. Remove foil during the last 10 minutes of cooking to insure the quiche cooks evenly.)
9- Remove from the oven and cool on a wire rack for 10 minutes before serving.
So there you have it… Cauliflower Crusted Tomato Basil Quiche. I really hope you enjoy this, and all of the recipes I share with you. I would greatly appreciate your feedback and comments. If you enjoy my recipes, please share them with your friends!
ENJOY 🙂
Tomato Basil Quiche
2015-05-25 11:38:03
Enjoy this Tomato Basil Quiche in a Cauliflower Pie Crust, or make it crustless. Either way, it is delicious!
2-3 Tomatoes, (one tomato sliced for the top & remaining tomatoes diced with seeds removed- I use 1-2 diced tomatoes, depending on the size)
1/3 cup fresh Basil, finely chopped
2 cloves Garlic
1/2 cup Onion, diced
1 Jalapeño, finely diced, with 4-5 slices (optional)
2 slices Turkey Bacon (optional)
5 Eggs or 4 Eggs with 2 Egg Whites
3/4 cup Light (Skim) Milk
1/2 - 3/4 cup Shredded Cheese (see note)* (+ additional for garnish, if desired)
3 Tbsp Parmesan Cheese
1/4 tsp Garlic Salt
1/4 tsp Pepper
Instructions
Heat a large skillet coated with non stick cooking spray. Sauté onion, garlic, and diced jalapeño (if using) until tender. Once cooked, transfer to a medium bowl and set aside.
Slice one of the tomatoes in half and scoop out all of the seeds. Once seeds are removed, dice the tomato and add to onion mix. Slice your second tomato into slices of desire thickness, and set aside.( You can also slice a few pieces of jalapeños for the garnish, if desired.)
Measure out 1/3 cup Basil leaves and finely chop the leaves to desired size. Add basil leaves to onion and tomato mix. Add in cooked turkey bacon, if using, and stir well. Set aside until Cauliflower crust has cooked.
In a medium bowl, whisk eggs, milk, salt and pepper, until well combined.
Once crust has cooked, add onion/tomato mix to the bottom of the pie pan. Top with a little over a 1/2 cup of shredded cheese.
Pour egg mixture evenly over the cheese, and gently stir, being sure not to disturb the crust.
Bake quiche at 350°F for 10 minutes. Carefully, remove the quiche from the oven, and garnish with sliced tomatoes and jalapeños. Lightly salt/pepper the sliced tomatoes and sprinkle with remaining parmesan cheese (and/or additional shredded cheese).
Return the quiche to the oven for about 40 minutes, or until the filling is set completely. (If you notice the quiche burning on the top, lightly cover with a piece of foil. Remove foil during the last 10 minutes of cooking to insure the quiche cooks evenly.)
Remove from the oven and cool on a wire rack for 10 minutes before serving.
Notes
*For the shredded cheese, I used a combination of Manchego and Chihuahua cheeses, but any mixture from Monterey Jack, Cheddar, Mozzarella, Manchego, or Chihuahua would work well.
*If you are using the Cauliflower Crust from yesterday's post, the oven will already be preheated. If you are not using the crust, preheat the oven to 350°F and spray the pie pan with non stick cooking spray. Set aside.
And it continues… Just when I start to think that I can not come up with new ways to use my beloved Cauliflower, I surprise myself… and come up with another recipe!
Today I want to share with you a two part recipe: Cauliflower Pie Crust and a Quiche.
Are you ready?
As you all know, Cauliflower is a staple in our house, but you might not know how much we also rely on Eggs… and Grilled Cheese Sandwiches (that’s a story for another day… please don’t get me started on that right now!)
So the recipe I have for you today and tomorrow combines Cauliflower with Eggs and more delicious veggies to make a Cauliflower Crusted Tomato Basil Quiche. I am so blessed to live in a country and town that I can run down to the local market and pick up the freshest fruits, veggies, and herbs on any Wednesday and Saturday… YEAR ROUND!
For todays recipe, I will say two things…
1- This cauliflower crust is completely versatile, and can be used to substitute a pie crust in many different instances.
2- YOU NEED TO TRY THISSSSSSS!!!!
So here we go…
Part 1-
Cauliflower Pie Crust
Ingredients:
1 (medium to large) head Cauliflower- (If you have a gigantic head of cauliflower, like the one in the last blog that is the size of my Fiancés head, use half!)
1/2 cup grated Parmesan Cheese
1 Egg
2 tsp Italian Seasoning
1 tsp Oregano
1/2 tsp Garlic Salt
1/2 tsp Pepper
Instructions:
1- Spray a 9 inch pie pan with non-stick cooking spray and set aside.
2- Rinse Cauliflower, and cut into small pieces, removing most of the stem, while keeping the florets.
3- Pulse Cauliflower in a food processor until it resembles a rice like consistency. (If you do not have a food processor, grate cauliflower with a cheese grater.)
4- Place the cauliflower in a microwave safe bowl and cook for 3 minutes. Stir cauliflower, and cook for an additional 2 minutes. Once fully cooked, set aside and allow to cool for at least 10 minutes.
5- Preheat oven to 400° F.
6- Once cauliflower has cooled enough to handle, transfer the cauliflower to a clean kitchen towel and wring out the moisture. Transfer the dry cauliflower back to the bowl.
7- Add parmesan cheese, egg, and spices to the cauliflower, and mix together with your hands.
8- Transfer the cauliflower mix to the prepared pie dish, smoothing it with your hands. Be sure to spread the cauliflower mix evenly on the bottom and sides of the dish. (see below)
9- Bake cauliflower crust for 10-15 minutes, until the edges and bottom begin to brown. (If you want a crispier crust, you can cook it for an additional 5 minutes.) * All ovens vary in temperature and cooking times.
Once you have pre-baked your crust, you can fill it with various different dishes, pies, quiches… anything your heart desires. Tomorrow, I will be sharing the Tomato Basil Quiche that I created to put into this yummy pie crust. Tomatoes, Fresh Basil, Eggs, Cheese, and more… Ok, I’m getting hungry. Stay tuned tomorrow for Part 2!!
For now, enjoy!
Cauliflower Pie Crust
2015-05-25 11:09:28
Substitute this crust for a pie crust in various recipes!
Spray a 9 inch pie pan with non-stick cooking spray and set aside.
Rinse Cauliflower, and cut into small pieces, removing most of the stem, while keeping the florets.
Pulse Cauliflower in a food processor until it resembles a rice like consistency. (If you do not have a food processor, grate cauliflower with a cheese grater.)
Place the cauliflower in a microwave safe bowl and cook for 3 minutes. Stir cauliflower, and cook for an additional 2 minutes. Once fully cooked, set aside and allow to cool for at least 10 minutes.
Preheat oven to 400° F.
Once cauliflower has cooled enough to handle, transfer the cauliflower to a clean kitchen towel and wring out the moisture. Transfer the dry cauliflower back to the bowl.
Add parmesan cheese, egg, and spices to the cauliflower, and mix together with your hands.
Transfer the cauliflower mix to the prepared pie dish, smoothing it with your hands. Be sure to spread the cauliflower mix evenly on the bottom and sides of the dish.
Bake cauliflower crust for 10-15 minutes, until the edges and bottom begin to brown. (If you want a crispier crust, you can cook it for an additional 5 minutes.)
Notes
* All ovens vary in temperature and cooking times.
So, today at the local market here in Puerto Aventuras I found this…
Yes, that’s right. A Cauliflower larger than my fiancés head.
Now if you haven’t figured it out yet… I LOVE Cauliflower. I’m pretty sure I’ve said that before, but just to reiterate… I LOVE CAULIFLOWER!
This cauliflower is almost 3 times the size of a normal head of cauliflower, so I should be able to make about 3-4 different recipes with this head! YIPPEEEEEE!
I was asked what I was going to do with this amazing find, and one of my answers was to make a broccoli and cauliflower casserole. I decided I would share this delicious recipe with all of you.
Are you hungry yet?
Well, here is goes… Welcome to Cheesy Baked Broccoli and Cauliflower!!!
Instructions:
1 fresh head Broccoli, cut into florets
1/2 fresh head Cauliflower, cut into florets
1/2 Tbsp no salt Butter
1 ½ cups fat-free Milk
2 Tbsp Flour
1/2 tsp Garlic Powder
1/2 tsp Pepper
1 clove Garlic
1/2 tsp (+ more for topping) Paprika
1/2 cup shredded Cheddar Cheese (I used combination of Cheddar, Monterrey Jack, & Mozzarella)*
*I have used many different cheese blends, and the recipe still turns out great. (Manchego, Chihuahua, Gouda, Cheddar, Monterrey Jack, Mozzarella, etc). I usually have Manchego and Chihuahua on hand, as they are quite affordable here in Mexico.
**As I live in Mexico, Laughing Cow cheese can be a bit more pricy than local cheese choices. If I do not have Laughing Cow cheese, I substitute Light Cream Cheese, and it works great!
***I added a couple of tablespoons of Parmesan cheese in with the Panko Breadcrumbs
Instructions:
1- In a stock pot, steam broccoli and cauliflower in water until cooked to tender. Once cooked, drain and set aside.
2- Preheat oven to 375F. Spray a 9in round casserole dish, or similar, with non stick cooking spray.
3- While broccoli and cauliflower are cooking, in a sauce pan, melt 1/2 Tbsp of butter. Once melted, add in the flour, and lightly brown. Add in milk and bring mixture to a light boil, whisking frequently, until sauce thickens.
4- Add in shredded cheese and Laughing Cow (or Cream Cheese) wedges. Stir to combine.
5- Once all cheeses are melted, cook cheese mixture for 2-3 minutes, then add in mayo, onion, garlic, and spices. Continue cooking for an additional 2-3 minutes. Sauce will thicken, again.
6- When cheese sauce and vegetables are finished cooking, placevegetables in the bottom of the casserole dish. Spoon cheese sauce evenly over the vegetables.
7- In a small bowl, melt 1/2 Tbsp of butter, and mix with the Panko crumbs, and an additional 1/2 tsp Paprika. Sprinkle crumbs evenly over the top of the vegetables.
8- Bake, covered with foil, for 15 minutes. Remove foil, and bake for an additional 10- 15 minutes, or until bubbly, and crumbs are lightly browned on top. Serve immediately.
This recipe is delicious, yet still healthy! I hope you will enjoy it as much as my family does. Here is a link to a printable version of the recipe: Cheesy Baked Broccoli and Cauliflower
Try this recipe out, and let me know how you like it! I would love to hear how you enjoy making your Cauliflower! ENJOY!